Saturday, May 14, 2011

Pre- and Post-test results


The vertical axis shows the number of possible correct points on each assessment. The horizontal axis shows how many students answered each quantity of correct points. Blue bars represent the scores on our pre-test, and as expected are in the low range of correct answers. Green Bars represent scores on our post-test, and show that on each test students improved. The least amount of improvement was on the art elements vocabulary, which may in part be from there being a greater number of possible answers to select from than the other tests, and that we focused on that particular vocabulary much earlier in the residency. The most remarkable improvement was in the science vocabulary (mostly the parts of the river).

Friday, January 28, 2011

Our project came to a natural conclusion as the students finished their narrative books and decided where on the map their Story (where their story took place-urban, suburban, or rural) should take place. They used all their prior knowledge about how towns and cities develop in proximity to a river and they thoughtfully placed (pinned) their "setting" or community on the map. It was gratifying to see and listen to them explain their decisions as they recalled previous information to decide the placement! Children who had urban settings were careful to place their fabric "city" piece near the mouth of the river, recalling how it is easier to ship goods from that point. Children who had suburban settings noted how things "were further apart" and placed their fabric further up the river, noting that it "wasn't as crowded". Children who had rural settings placed their fabric further away from the cities, where they noticed a lot of open land, closer to tributaries.
The students ability to synthesize the concepts they had learned/experienced was evident at this point of the project! Earlier learning experiences had been much more scaffolded, so it was exciting to see them apply what they had learned!

Wednesday, January 26, 2011

Final communities Day

On our final scheduled session, we managed to wrap up some loose ends. We spent the first 20 minutes completing the arts and social studies post-tests to be able to measure the students' understanding of the vocabulary. Afterwards, we had the students move into their "community" groups of rural, suburban, and urban.
I hung the Delaware River Valley map we'd been working on before and we reviewed the parts of the river and what states appeared on our map, and asked "What's Missing?" The students all called out- "Our towns!" we reviewed where our urban areas of Philadelphia, Wilmington, and Delaware were on the map. Cindy brought over the community concentric circle graphic to help us remember how our communities would be arranged. We talked a bit about why the urban areas developed near the river and asked the students to think about where they should place their own town on the map.
We passed their narrative books back to the children for them to read each other's books while I invited groups up to the fabric map to pin their town in place. The map came to life with their colorful applique towns attached. The students really enjoyed getting to read their classmates stories!
To complete the final piece I've been stitching the towns down, and it will have a border fabric to bind the edges. We'll have some more time before the end of the school year when I will return to install the piece and work with the children a bit more.

I'll be posting the post-test results soon, as well as an image of the final product.

Sunday, January 9, 2011

Community Narratives

 Last Wednesday, the students had their narratives already prepared to copy into their pamphlet. Cindy had reviewed them and suggested one more sentence to transform into a "show not tell" sentence for each student. We helped brainstorm and check spelling with students one-on-one. When everyone was finished I explained the pamphlet book construction. The kids remembered that the last book we made was an accordion fold book. For a pamphlet book pages are folded in half and stacked into a signature to be sewn-bound along the spine. We did a quick math computation: the children counted their sentences/the pages they'd need which had to be divided in half to count how many sheets of folded paper they'd need. For example for a 10 page book one needs 5 sheets of paper. We explained how to copy the sentences into their books using a heavy-lined sheet of paper laid under the page they were working on for guide lines to show through.
Each child figured out how many sheets they would need an we passed out the paper for their folded signatures. The rest of the session was spent with intense focus as the students very carefully copied out their stories into the books.
 At the end of the period we passed out an additional blank folded sheet to serve as a title page, as well as the cover pages. I had scanned in each student's community embroidery and printed them out onto cardstock for the covers, since their stories had been inspired by the embroideries they had made.
 Before our session on Friday, I pierced each book 3 times along the spine with an awl to prepare for binding. As a class, together we followed directions on how to sew a 3-point pamphlet binding. Up through the center hole, down through the top hole, up through the bottom hole, and down through the center hole, with the two ends tied together across the long float down the spine. Unfortunately, the students had trouble keeping their holes lined up. Learning curve! If I were to do this with this age group again I would either hole-punch the holes for larger, more easily lined-up holes, or I would have clips to hold the pages firmly in place for binding. However, with help, everyone managed to get their books bound!
 The rest of the session was spent making sure the cover and title pages were complete, and working on illustrating their stories.
 The students were encouraged to read the sentences on each page, picture it in their mind, and draw all the details they saw. They were asked to use the whole page and consider backgrounds for their objects and figures.
 Cindy reminded the students that if they were to read their book to a kindergartner, a younger child would want to see big, bright, easy-to-see pictures.
 I think we'll spend a little bit more time on illustrations next week before we wrap up the collaborative project. Only a few more days left!!

Wednesday, January 5, 2011

a little more

On Wednesday, the students had their task set out for them. The hard work was done, now they had to place their pre-segmented story into the pages of a book. The illustrations come next!

Cindy's add-on

Monday was a busy day for writing. The students spent the morning brainstorming and filling out a graphic organizer to help focus their narrative piece. Marie has done an excellent job (again!) explaining the sequence of events that led up to the completion of the graphic organizer. Writing an organized piece takes much planning and the students are now used to organizing their thoughts on a graphic organizer. That part went smoothly.
Having them embellish their writing piece took a bit more scaffolding. Marie and I encouraged them to really think about their plot (problem/solution) and the characters. They wrote out a rough draft independently, and all in all, the results were pretty good! The next step in writing the mini-book was to separate the story into separate "pages". I helped them find natural "breaks" in the story and we marked them with a symbol, a colored small box that we put in with a marker. This broke the story into 'pages'. Next, i had them re-write the rough draft, telling them to listen for a "beep" (the colored square), then skip a line and write the next sentence or sentences.
Once this was done, I circled one of the sentence/sentences that had been separated, and had them really focus on embellishing that one section. This broke their task into a manageable piece that I felt they could handle. The results were fabulous. Simply asking them to add more to the written piece was too overwhelming for them, so this segmenting really did the job!

Tuesday, January 4, 2011

Community Narratives

On Monday Cindy started us off with a review of "Showing, not Telling" sentences. We selected a few of the children's applique blocks to pull out a simple sentence, and the children had to come up with descriptive adjectives and adverbs using their thesauruses to expand their sentences. For example:

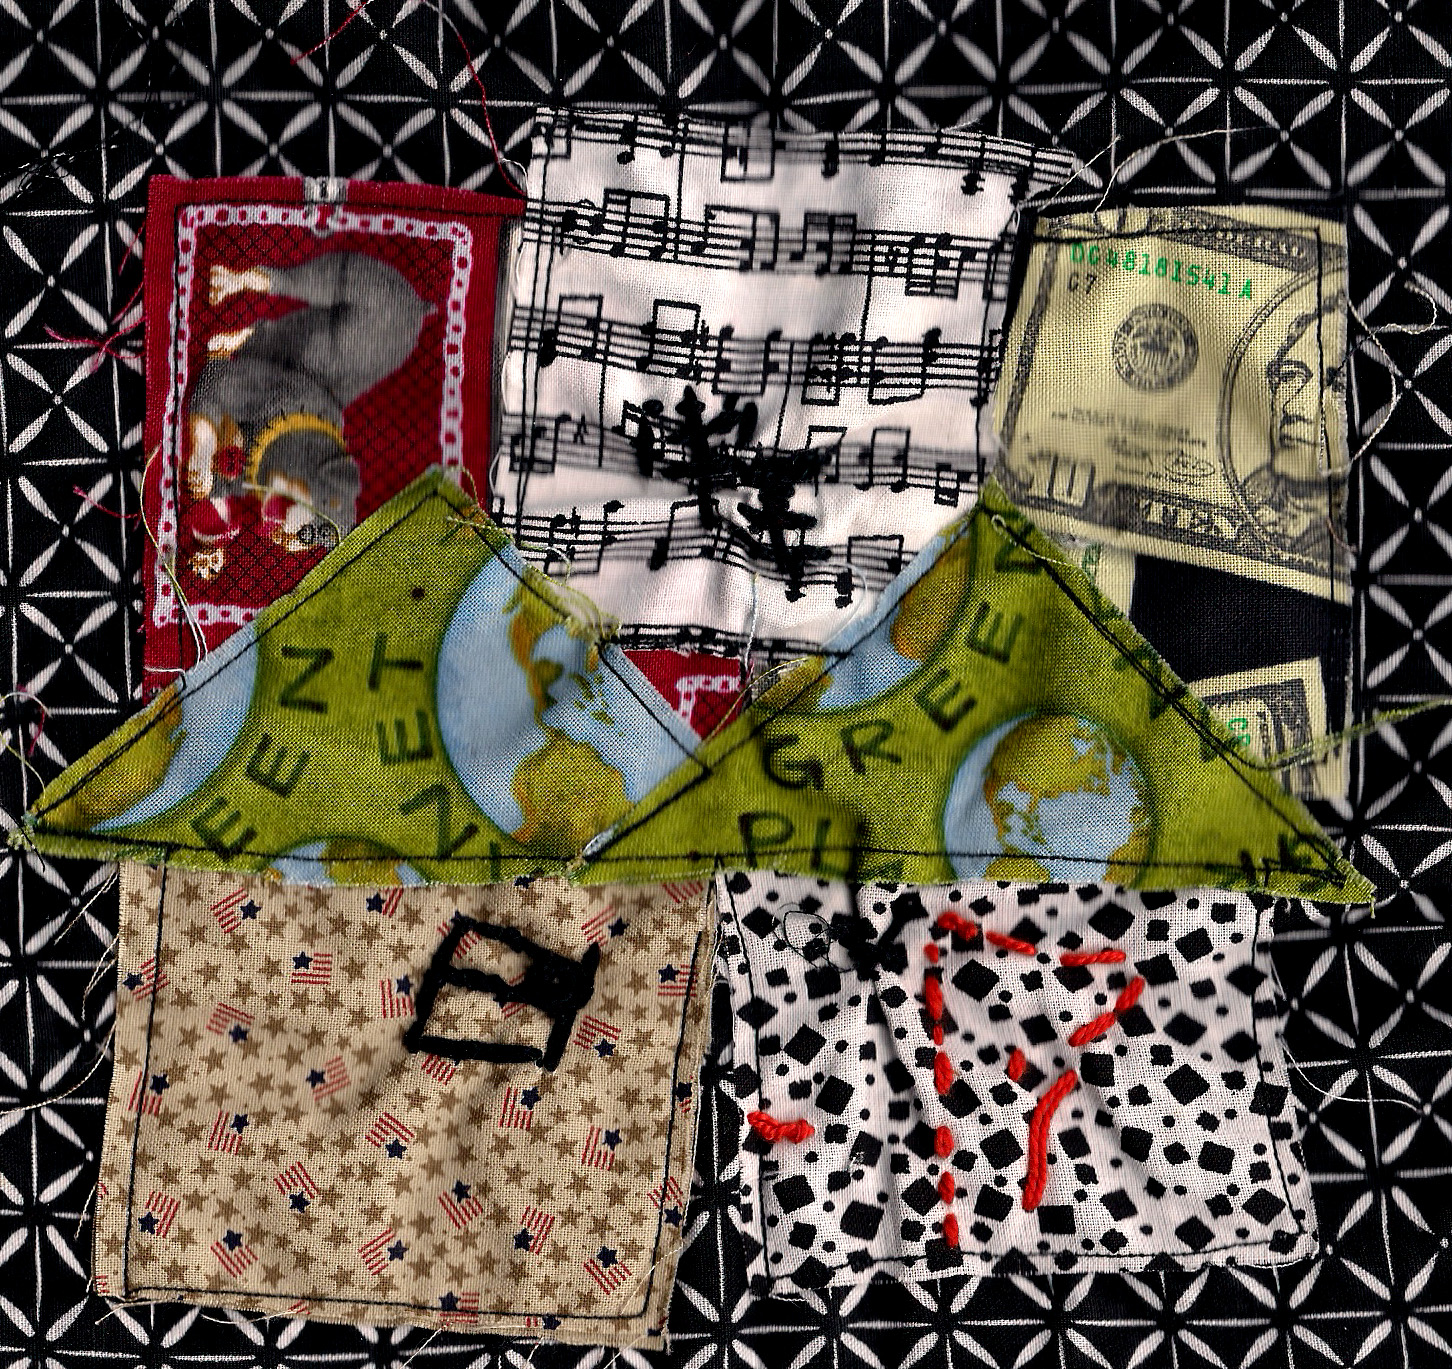
Seth's urban burglar on the roof
"The burglar is on the roof" (typical simple 3rd grade sentence inspired by one of the embroideries)
burglar: sneaky, quiet, malicious, bad, bungling, etc.
roof: slanted, flat, tall, high, pitched, slippery, dangerous, etc.
is? (could be a more active sentence): climbed quietly, slinked carefully, waited patiently, tip-toed precariously, etc.
==> "The quiet, sneaky burglar slinked carefully across the slippery, slanted roof" (much more interesting sentence!)

After creating some more interesting sentences, we explained that entire stories could come out of the children's pictures. We talked about using the setting (rural, suburban, urban) from their pictures and choosing characters to live there (perhaps from the details they stitched). We came up with some examples of problems and solutions the characters might experience if they lived inside the children's pictures. Then we brainstormed what a beginning, middle, and end of the story might be. The children were provided with a graphic organizer to use for their brainstorming, and I passed their embroideries back to them. I encouraged the students to look at what they had created, imagine themselves entering the picture, and think about what it might be like to live there- what would it be like? What problems would there be?
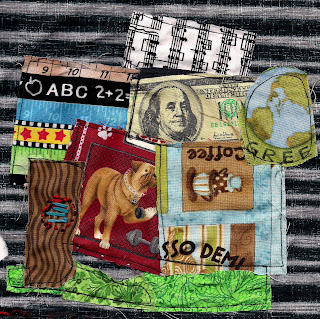
Alex said she had a daycare center, a school, a park, and an animal adoption center. She made up a story where the children from the school went to visit the adoption center, but a dog escaped, ran around the park, and the children helped capture him again! 

Cindy and I worked around the room, talked to the children about their plans, helped elicit ideas, and kept everyone focused. When children were stuck I asked them to tell me a little about their picture- what buildings had they included, who lived there, what's happening, where could people go, what could they do in that community?
The brainstorming activity took up our morning session, but all the children completed their organizer for the writing of a narrative problem/solution story based off of their community applique embroidery. Since we need to make up some time, we decided I should stay for the afternoon as well to work towards our next goal of a finished written piece inspired by their own artwork.
Emily's grumpy farmer- his sheep kept escaping to the clover field
In our afternoon session Cindy modeled how to use the graphic organizer to flesh out a story using one of the children's appliques and organizers. As a class we offered both plot suggestions as well as vocabulary suggestions for making the story more fun and interesting for the reader. Doing this as a group hopefully helped the children see how the descriptive words they choose can help a writer make decisions. For example, if a character is a "grumpy farmer", well why was he grumpy in the first place? Once the activity was modeled, we passed out writing paper to start the first draft. Again Cindy and I worked the room, helping students stay on task, asking questions to spark their imagination, and editing the drafts as they were complete.
We've decided to have the children create another handmade book for the final version of the stories and illustrate them. I'm scanning thir pictures in to print and use for the covers.